


Welcome to lesson 3 of our “Power Up Your JSM” mini-course! In lessons 1 and 2, you learned about queues, SLAs, and escalations. Now, we’re focusing on custom request types and dynamic forms—two powerful features that reduce confusion and ensure every ticket includes all the info your team needs.
Course snapshot: Lesson 3 – request types & dynamic forms
Duration: ~12 minutes
Format: Written guide with examples, form logic, and implementation steps
Audience: JSM admins, service desk leads, and internal support team managers (e.g., HR, Finance)
Expertise Level: Intermediate (some familiarity with JSM project settings and forms)
Key Focus: Consolidating and customizing request types with dynamic, conditional logic
Outcome: Reduce ticket friction, improve form accuracy, and scale workflows across teams
Why custom request types and dynamic forms?
- Better User Experience: Users see exactly what info they should provide.
- Less Noise: Each request is automatically categorized, preventing back-and-forth for missing details.
- Tailored Workflows: Different departments can have unique, specialized forms (e.g., HR leave requests).
- Scalability: You can add or refine request types as your organization grows.
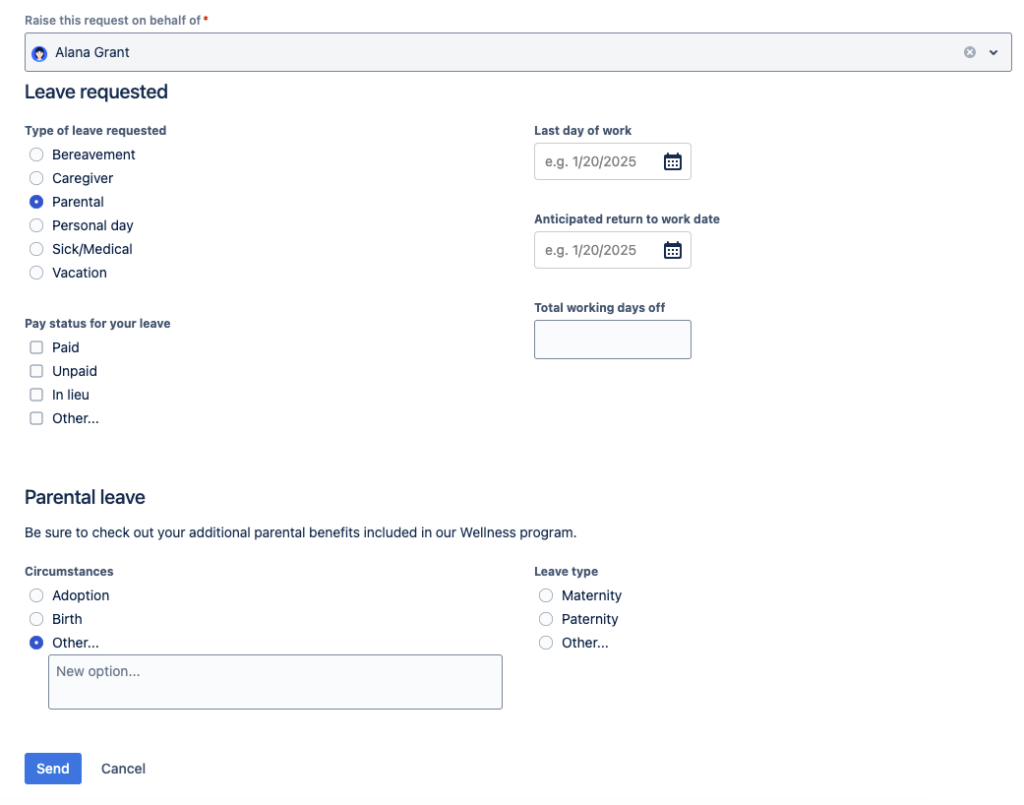
Real-world example (leave requests):
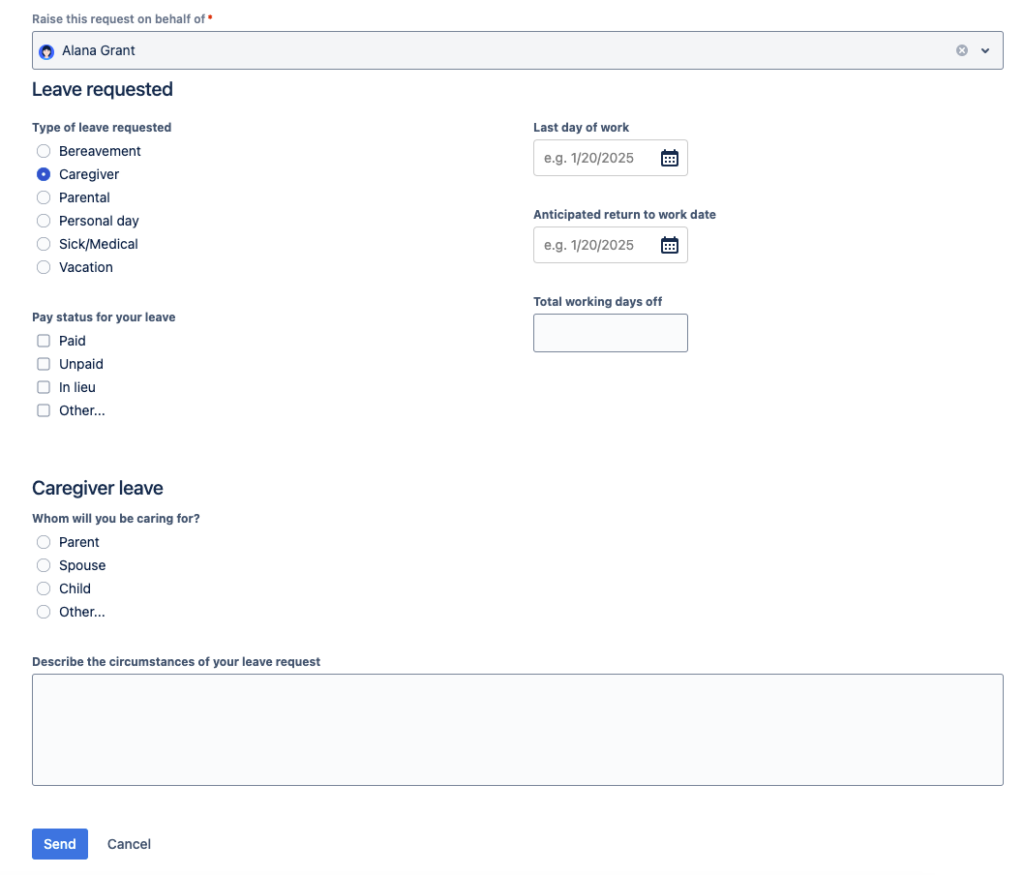
Our HR department consolidated all types of leave (e.g., Bereavement, Caregiver, Parental, Sick/Medical) into a single “Leave Request” form. By using dynamic fields, employees only see relevant sections.
- Caregiver Leave: If chosen, an additional set of questions appears (e.g., “Whom will you be caring for?”).
- Parental Leave: Selecting “Parental” reveals fields for “Circumstances” (Adoption, Birth) and “Leave type” (Maternity, Paternity).
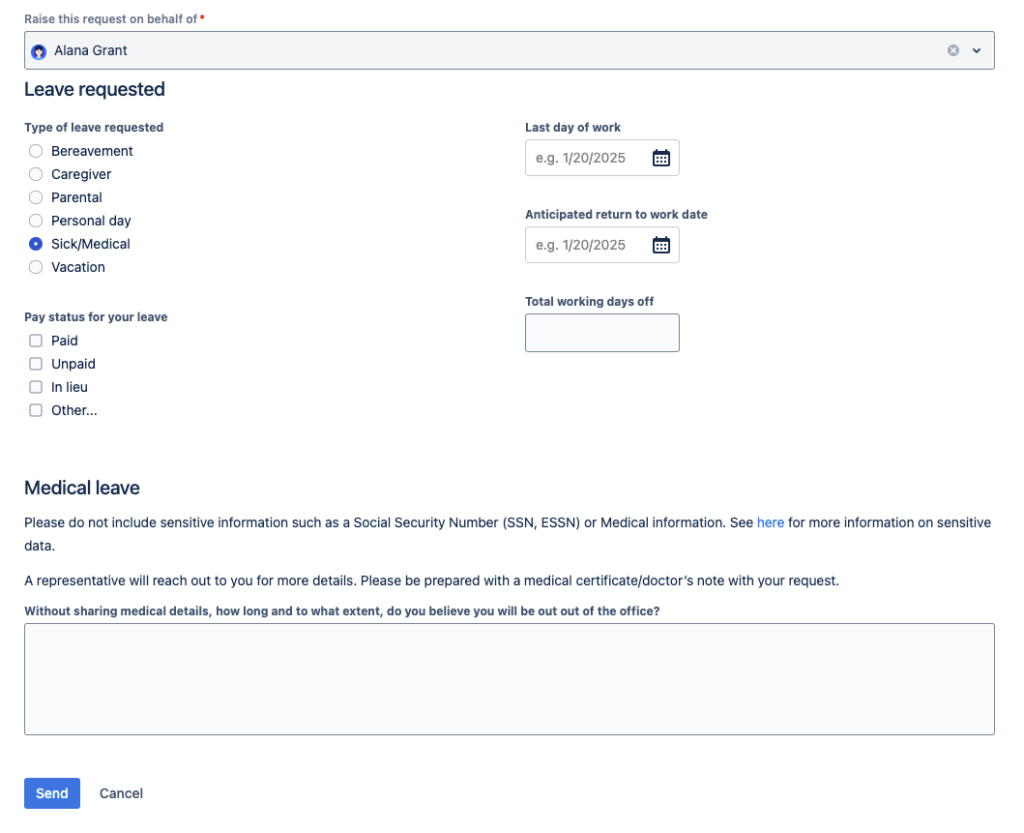
- Sick/Medical: Offers a space to describe expected downtime but reminds employees not to include sensitive info (SSN, medical details).
As a result, the HR team drastically reduced back-and-forth clarifications and ensured each leave request had exactly the details needed to expedite approval.
How to create custom leave requests & dynamic forms
1. Go to “Project Settings” → “Request Types.”
2. Create a new request type called “Request for Leave” (or any appropriate name).
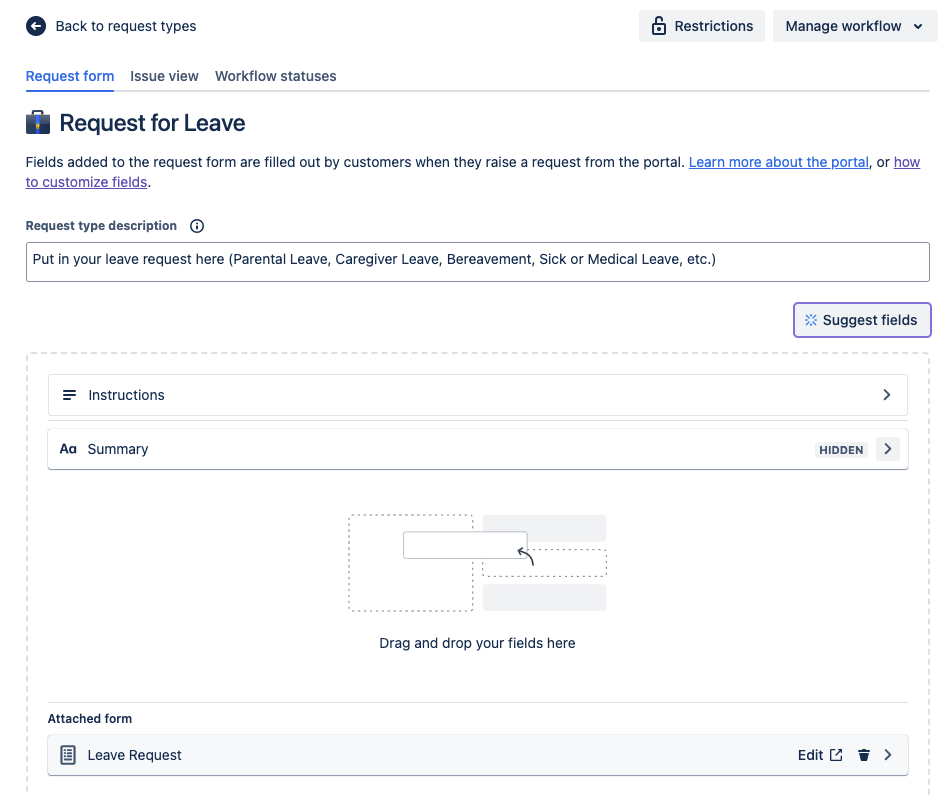
3. Add fields for basic details (last day of work, anticipated return date, total working days off).
4. Use conditional fields (via Forms) to show or hide certain sections based on user selections:
- Go to “Project Settings” → Forms → Create Form.
- E.g., if “Caregiver” is chosen, display “Whom will you be caring for?” and a free-text field for circumstances.
- If “Sick/Medical” is chosen, display a text area prompting them not to include sensitive data.
- If “Parental” is chosen, reveal fields for adoption/birth, leave type, etc.
5. Preview & Test in the customer portal, ensuring the form adapts based on chosen leave type.
You need to be an admin to:
- Create or modify request types
- Add custom/conditional fields in forms (ProForma/Forms feature)
- Configure automations for routing or approvals
Put it into practice:
- Create or modify request types
- Add custom/conditional fields in forms (ProForma/Forms feature)
- Configure automations for routing or approvals
If you don’t have admin privileges, coordinate with your Jira administrator to make these changes.
Helpful resources:
Lesson 4 preview:
Next, we’ll explore advanced automation & integrations so you can eliminate repetitive work and make your service desk even more efficient.
Need help designing dynamic leave requests?
- Book a 15-minute “JSM Optimization” Call and we’ll tailor a form to your exact requirements.
Want the full experience?
- Lessons 1–3 will be posted here each week under eLearning.
- Lessons 4 and 5 covering advanced automation and knowledge base integration are available for download.
Click the button below to get instant access to our full mini-course which includes all 5 lessons, for free!