


Welcome to lesson 2 of our “Power Up Your JSM” mini-course! Previously, you learned how to set up queues for faster triage. Now, we’re diving into SLAs and Escalations, your key to meeting service targets and keeping customers happy.
Course Snapshot: Lesson 2 – SLAs & auto-escalations
Duration: ~12 minutes
Format: Written guide with step-by-step walkthroughs and real-world use cases
Audience: JSM admins, service desk leads, operations managers
Expertise Level: Intermediate (basic understanding of SLA configuration recommended)
Key Focus: SLA setup, breach conditions, automated escalation rules
Outcome: Improve SLA compliance, reduce overdue tickets, and build confidence with proactive escalation workflows
Why SLAs and escalations?
- Accountability: Clear time goals keep your team on track.
- Visibility: Agents & leads see which issues are nearing breach.
- Customer Satisfaction: Tickets resolved on time = happier customers.
- Risk Mitigation: Auto-escalations prevent high-priority items from slipping through the cracks.
Real-world example:
A global fintech company added advanced SLA rules for “Time to First Response” on high-priority issues. Then they configured an auto-escalation to reassign or notify management at 70% SLA usage. Overdue tickets dropped by half, and VIP customers reported a boost in confidence.
How to create an advanced SLA & escalation
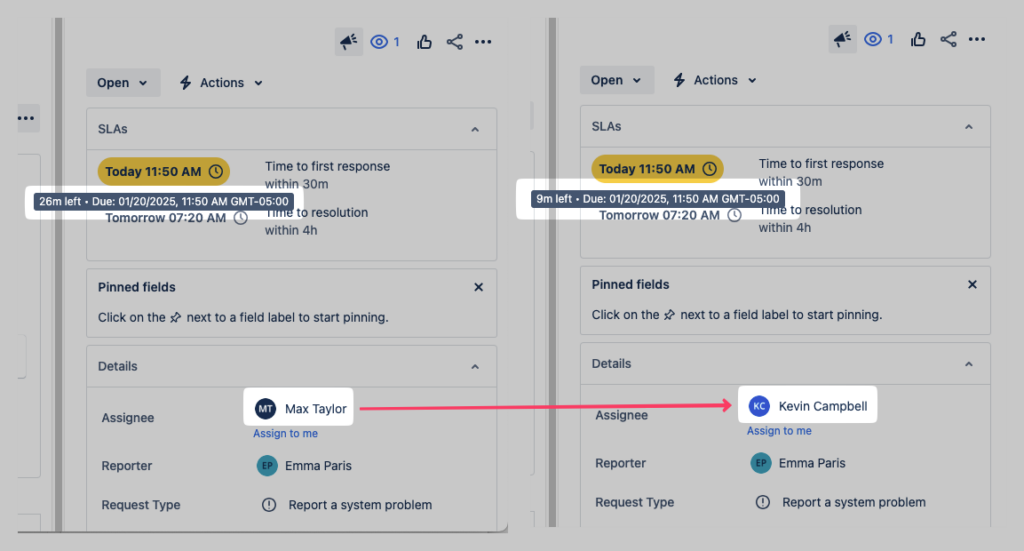
1. Define Your SLA Metric
- Go to Project Settings → SLAs, and click Add SLA. If you already have one, you can customize your “Time to First Response” SLA.
- Configure conditions (e.g.,
priority = High) and time goals (e.g., 30m for High Priority).
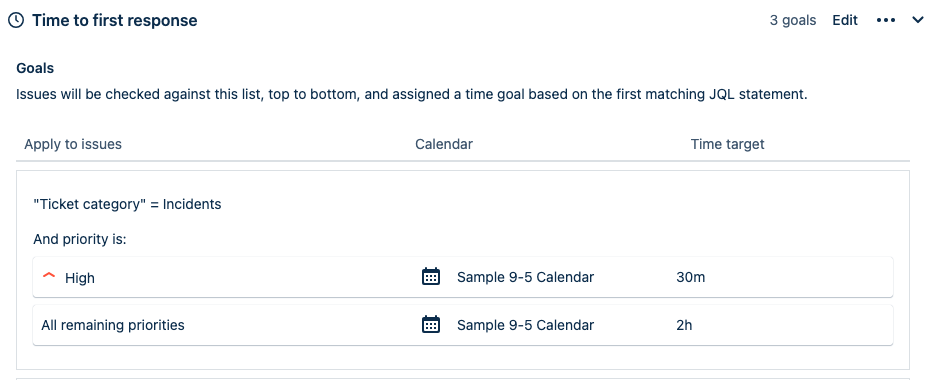
- Save your new SLA and confirm it’s visible on relevant tickets.
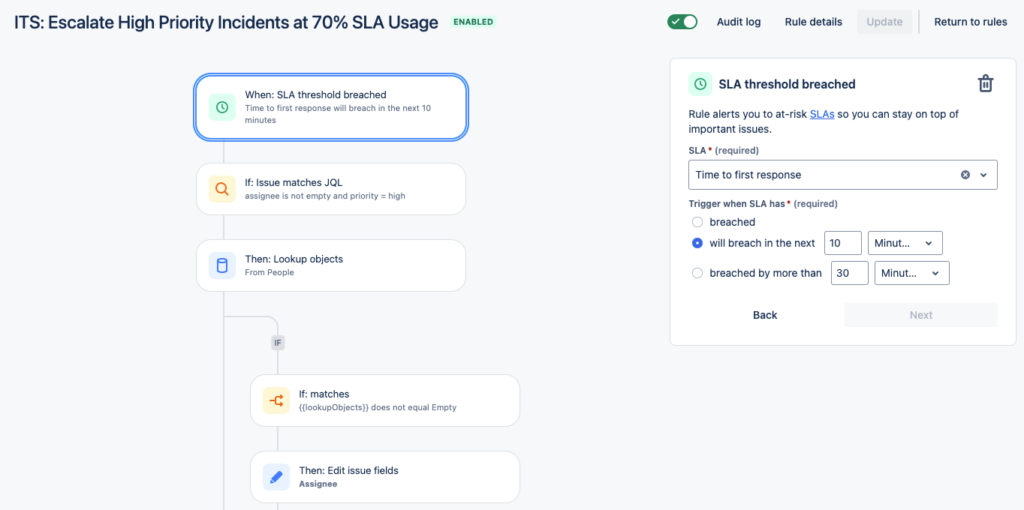
2. Add an Escalation Rule
- Go to Project Settings → Automation, then Create Rule.
- Trigger: “SLA threshold breached.”
- Condition (optional): e.g., priority = High.
- Action: Reassign to a senior agent, alert a manager, or increase priority when the SLA is 70% or 90% used.
- This ensures any critical ticket doesn’t go overlooked as it nears its breach time.
3. Test & Verify
- Raise a test ticket with High Priority.
- Watch your SLA countdown, then confirm the auto-escalation triggers when your threshold is hit (e.g., manager gets an email, ticket priority changes, etc.).
You need to be an admin to:
- Create or modify SLA goals.
- Set up automation rules for escalations.
- Access and modify project settings to configure SLA conditions.
If you don’t have admin access, reach out to your administrator to help implement these changes.
Put it into practice:
- Create a new “Critical Resolution” SLA metric with a short target (e.g., 4h).
- Set up an escalation rule that triggers at 70% or 90% usage—have it reassign or notify a manager.
- Observe how many tickets get escalated and how much faster they’re resolved!
Helpful resources:
Lesson 3 preview:
Next, we’ll dive into custom request types & dynamic forms, helping you streamline how end users submit tickets. Stay tuned!
Got SLA questions or want a deeper consultation?
- Schedule an SLA Audit Call with our JSM experts. We’ll help you pinpoint the right metrics for your team.
Want the full experience?
- Lessons 1–3 will be posted here each week under eLearning.
- Lessons 4 and 5 covering advanced automation and knowledge base integration are available for download.